
Storeys & organiser
The Project palette is where the building is organised. It opens by itself at start-up; Plugins → Archeform → Project Palette brings it back if you close it.
Across the top are the switches Isolate, Site, Zones, Flat and 3D. Below them, six sections: STOREYS, PLANS, ELEVATIONS, SECTIONS, SCHEDULES and IFC, with Export… at the bottom.
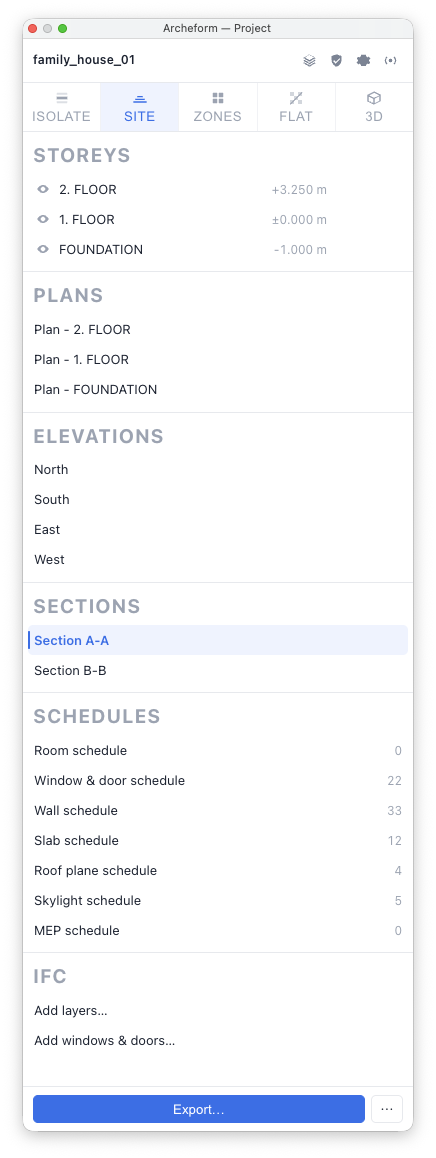
Storeys
Section titled “Storeys”Each row is one storey. Clicking it makes it active — new elements land inside it, and plans and sections use it as their reference.
| Button | What it does |
|---|---|
| eye | show or hide this storey |
| copy | duplicate the storey with everything in it |
| pencil | rename, change height, insert above or below |
| bin | delete the storey and its contents |
Heights, not elevations
Section titled “Heights, not elevations”A storey carries a height — floor to floor. Elevations are derived by stacking. Change one storey’s height and everything above moves, contents included, which is what you want when a slab gets thicker halfway through a job.
Inserting
Section titled “Inserting”The pencil dialog inserts above or below the storey you opened it from. Inserting below pushes everything down; the first storey is always ±0,000.
Copying
Section titled “Copying”Copy duplicates a storey with its contents, giving every copied element a fresh identity. That last part matters: without it, the copies would share identifiers with the originals and a viewer would treat them as one object.
Draw the typical floor once, copy it upward, change what differs.
Moving elements between storeys
Section titled “Moving elements between storeys”Select them, right-click, Archeform → Move to Storey or Copy to Storey, pick the target. Rooms are renumbered to match the storey they land in.
The footer
Section titled “The footer”| Isolate | show only the active storey |
| Site | ground plane at ±0,000 |
| Fills | regenerate section hatching in all storeys |
| Merge | hide seam lines between walls and slabs on facades |
| Export… | generate all scenes and write the LayOut file |
Isolate is separate from selection. With it off you can switch the active storey without changing what you see — useful when you are drawing on one level and want the one below visible for reference.
The header
Section titled “The header”| + | add a storey |
| shield | check the model before IFC export |
| layers | Constructions — the composition library |
| gear | project settings |
| 3D | back to a perspective view, section planes off |
Plans, elevations, sections
Section titled “Plans, elevations, sections”Below the storeys, three lists of documentation views.
PLANS has a permanent row per storey. Clicking one activates that storey and switches to the plan view. The ⟳ regenerates the documentation scenes.
ELEVATIONS generates the four facade scenes. Facade edges are merged first, so you don’t get seam lines where walls meet slabs.
SECTIONS lists named sections. Add one with the section tool: click the line, then click the side you are looking at. You get a scene, a cut plane, filled cuts, and a section mark with arrows and a letter in every plan.
The ⟳ next to each list regenerates that group of scenes.
Level markers
Section titled “Level markers”Each storey draws a marker in the model: a quartered benchmark disc, a level line along the front edge, a faint dashed frame around the working area, and a text label with the name and elevation.
The frame and line grow with the contents of the storey, so they stay a useful reference rather than an arbitrary rectangle. Both are on their own tags and can be switched off in project settings.